
Welcome to the Honeywell 7-Day Programmable Thermostat manual! This guide provides comprehensive instructions for the CM907 model, designed to enhance energy efficiency and user convenience․ Learn how to install, program, and optimize your thermostat for seamless temperature control and energy savings․
1․1 Overview of the Thermostat
The Honeywell 7-Day Programmable Thermostat is a cutting-edge device designed to provide precise temperature control and energy efficiency․ This thermostat allows users to program temperature settings for each day of the week, offering flexibility and customization to suit various lifestyles․ With its intuitive interface and advanced features, it ensures comfort and energy savings․ The CM907 model, specifically, is known for its reliability and ease of use, making it a popular choice for homeowners․ It supports both heating and cooling systems, adapting seamlessly to different HVAC setups․ The thermostat’s programmable schedule enables users to set specific temperatures for wake, sleep, and away periods, optimizing energy usage․ Additionally, features like Smart Response Technology and remote access via smartphone app enhance its functionality․ This thermostat is designed to be user-friendly, with a clear display and straightforward navigation, making it easy to adjust settings or override programs as needed․ Whether you prioritize energy efficiency or consistent comfort, the Honeywell 7-Day Programmable Thermostat delivers a balanced solution for modern home heating and cooling needs․
1․2 Benefits of Using a Programmable Thermostat
Using a programmable thermostat offers numerous advantages for homeowners seeking energy efficiency and convenience․ With the Honeywell 7-Day Programmable Thermostat, you can create a customized schedule that aligns with your daily routine, ensuring your heating and cooling systems operate only when needed․ This feature helps reduce energy waste and lowers utility bills․ Additionally, programmable thermostats like the Honeywell CM907 provide consistent comfort by maintaining optimal temperatures throughout the day and night․ The ability to pre-set temperature changes eliminates the need for manual adjustments, making it easier to manage your home’s climate․ Furthermore, programmable thermostats are environmentally friendly, as they promote energy conservation without sacrificing comfort․ With features like Smart Response Technology and energy-saving modes, you can enjoy a seamless and efficient heating experience․ Overall, a programmable thermostat is a practical investment for any homeowner looking to enhance comfort, reduce energy consumption, and save money on heating costs․
1․3 Honeywell CM907 Model Overview
The Honeywell CM907 is a 7-day programmable thermostat designed for precise temperature control and energy efficiency․ It offers a user-friendly interface with a backlit display, making it easy to navigate and program․ This model is compatible with a wide range of heating systems, including gas, oil, and electric, ensuring versatility for different home setups․
One of its standout features is the ability to set unique temperature schedules for each day of the week, allowing users to tailor their comfort levels to their lifestyle․ The CM907 also includes energy-saving modes and adaptive recovery technology, which learns the time needed to reach the desired temperature, optimizing performance and reducing energy waste․
With its sleek design and advanced functionality, the Honeywell CM907 is ideal for both residential and light commercial applications․ It supports multi-stage heating systems and can be configured to work with optional remote sensors for enhanced temperature accuracy․ This thermostat is a reliable choice for those seeking a balance between convenience, efficiency, and cost-effectiveness․

Installation and Setup
Ensure system compatibility and follow step-by-step installation guides for the Honeywell CM907․ Refer to wiring diagrams for correct connections․ Post-installation checks confirm proper functionality․ Always adhere to safety guidelines and manufacturer instructions for a secure setup․
2․1 System Compatibility Check
Before installing your Honeywell 7-Day Programmable Thermostat, ensure it is compatible with your HVAC system․ The thermostat works with most heating and cooling systems, including gas, electric, oil, and heat pumps․ Verify the voltage requirements, as most models operate on 24V AC․ Check the wiring configuration to confirm it matches the thermostat’s terminal connections (e․g․, R, W, Y, G, C, etc․)․
For heat-only or cool-only systems, the thermostat will function without issues․ However, for dual fuel or multi-stage systems, additional setup may be required․ Ensure your system includes a room thermostat and, if applicable, a hot water thermostat, set to appropriate temperatures (typically 20°C for rooms)․
Refer to the user manual or installation guide for specific compatibility details․ If unsure, consult a professional to avoid installation errors․ Proper compatibility ensures optimal performance and energy efficiency․ Always double-check your system specifications before proceeding with installation․
2․2 Step-by-Step Installation Guide
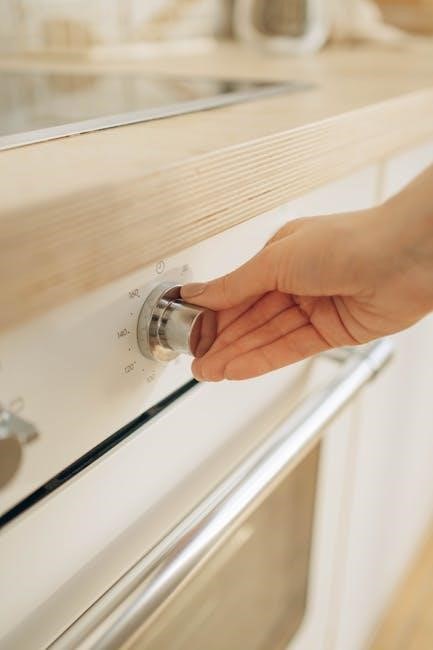
Installing your Honeywell 7-Day Programmable Thermostat is a straightforward process that requires basic tools and attention to detail․ Start by turning off the power to your HVAC system at the circuit breaker or fuse box․ Remove the old thermostat and take note of the wiring configuration for reference․ Next, mount the new thermostat base to the wall using the provided screws, ensuring it is level and securely fastened․
Connect the wires to the appropriate terminals on the new thermostat, matching the labels from your system (e․g․, R, W, Y, G, C)․ If unsure, consult the wiring diagram in the manual or online resources․ Once all wires are connected, snap the thermostat faceplate onto the base until it clicks into place․ Turn the power back on and test the system by setting a temperature and ensuring it responds correctly․ Finally, program your custom schedule using the intuitive interface․ Proper installation ensures optimal performance, energy efficiency, and trouble-free operation․ Always refer to the manual or online guides for specific model instructions, such as the Honeywell CM907, to avoid errors․
2․3 Wiring Diagrams and Requirements
Proper wiring is essential for the Honeywell 7-Day Programmable Thermostat to function correctly․ Refer to the provided wiring diagrams in the manual to ensure accurate connections․ The thermostat requires a 24V AC power supply, typically derived from the heating or cooling system․ Identify the RCH terminal for the red wire, which connects to the 24V AC power․ The W and Y terminals are for heating and cooling stages, respectively, while the G terminal controls the fan․ Ensure the C (common) wire is connected to the transformer to complete the circuit․
- Verify that all wires are securely connected to avoid loose terminals, which can cause malfunctions․
- Use the correct wire colors as per the diagram: red (R), white (W), yellow (Y), green (G), blue (C), and orange (O) for heat pumps․
- Double-check the wiring configuration to match your HVAC system type, whether it’s a heat pump, gas furnace, or electric system․
If unsure, consult a licensed electrician or the installation manual for further clarification․ Correct wiring ensures safe and efficient operation of your Honeywell thermostat․

2․4 Post-Installation System Checks
After completing the installation of your Honeywell 7-Day Programmable Thermostat, it is essential to perform a series of system checks to ensure everything is functioning correctly․ Start by verifying that the thermostat is properly powered on and that the display is active․ Check the wiring connections to confirm they are secure and match the wiring diagram provided in the manual․
Next, test the HVAC system by setting the thermostat to a specific temperature and observing if the heating or cooling system responds accordingly․ Ensure that the system cycles on and off as expected․ If you have a hot water system, verify that the temperature is set to the recommended 20°C for optimal performance․
Additionally, review the programmable schedule to ensure it is correctly configured for your daily routine․ Test the HOLD and PERMANENT HOLD features to confirm they operate as intended․ Finally, check the energy-saving features, such as Smart Response Technology, to ensure they are enabled and functioning properly․ These checks will help you confirm that your thermostat is installed correctly and ready for efficient operation․

Programming Your Thermostat
Program your Honeywell thermostat with a 7-day schedule for customized comfort․ Set specific temperatures for weekdays and weekends, adjusting as needed․ Use Smart Response for adaptive heating and energy-saving modes to optimize efficiency and maintain ideal temperatures effortlessly․
3․1 Understanding the 7-Day Programming Schedule
The Honeywell 7-Day Programmable Thermostat allows you to create a customized temperature schedule for each day of the week․ This feature provides flexibility, enabling you to set specific temperature preferences for different times, ensuring comfort and energy efficiency․ The thermostat lets you program up to four temperature settings daily, such as wake, leave, return, and sleep events․ For example, you can set the thermostat to lower the temperature when you leave for work and raise it before you return home․
- Customization: Each day can have unique temperature settings, or you can group days together (e․g․, weekdays or weekends) for simplicity․
- Energy Efficiency: By adjusting temperatures when you’re not home or sleeping, you can reduce energy consumption and lower utility bills․
- Default Settings: The thermostat comes with pre-programmed schedules, but these can bemodified to suit your lifestyle․
- Hold Feature: If you need to override the schedule temporarily, the Hold feature allows you to maintain a specific temperature until the next programmed event․
Understanding and utilizing the 7-day programming schedule is key to maximizing the thermostat’s benefits, ensuring your home remains comfortable while optimizing energy use․
3․2 Creating a Custom Weekly Schedule
Creating a custom weekly schedule for your Honeywell 7-Day Programmable Thermostat allows you to tailor temperature settings to your daily routine, optimizing comfort and energy efficiency․ Start by accessing the thermostat’s programming menu, typically found under the “Schedule” or “Program” option․ From there, you can set different temperature points for each day of the week․
Select the day(s) you wish to program․ For flexibility, you can program each day individually or copy settings across multiple days․ For example, set a consistent schedule for weekdays and a relaxed schedule for weekends․
Choose the desired wake, leave, return, and sleep times․ Adjust the temperature setpoints for each period to reflect your preferences․ For instance, lower the temperature when no one is home or during sleep hours to save energy․
Utilize the “Hold” feature to override the schedule temporarily or use “Permanent Hold” to maintain a constant temperature indefinitely․ This is useful for vacations or extended periods away from home․
Review and confirm your schedule to ensure all settings align with your lifestyle․ The thermostat will automatically adjust temperatures based on your programmed preferences, providing consistent comfort while reducing energy consumption․
By tailoring your weekly schedule, you can maximize the efficiency of your Honeywell thermostat and enjoy a comfortable living environment․
3․3 Customizing Weekend Settings
Customizing weekend settings on your Honeywell 7-Day Programmable Thermostat allows you to create a schedule tailored to your weekend routine, ensuring comfort and energy efficiency․ To access weekend customization, navigate to the “Schedule” or “Program” menu on your thermostat․ Here, you can adjust temperature setpoints for Saturday and Sunday independently or apply the same settings to both days․
For example, if you prefer a warmer temperature on lazy weekend mornings, you can set a later “wake-up” time with a higher temperature․ Similarly, if you plan outdoor activities, you can lower the temperature during the day to reduce energy usage while you’re away․ The thermostat also allows you to schedule different setpoints for morning, afternoon, evening, and night, giving you full control over your weekend comfort․
Additionally, you can use the “Hold” or “Permanent Hold” feature to override your weekend schedule temporarily or indefinitely, which is useful for unexpected changes in plans․ By customizing your weekend settings, you can enjoy a relaxed and energy-efficient weekend while maintaining your desired level of comfort․
3․4 Adjusting Temperature Setpoints
Adjusting temperature setpoints on your Honeywell 7-Day Programmable Thermostat allows you to customize comfort levels throughout the day․ To modify setpoints, navigate to the programming menu and select the desired time period (e․g․, wake, leave, return, sleep)․ Use the arrow keys to increase or decrease the temperature settings․ Ensure temperatures are set between 40°F and 90°F for heating, and 30°F to 99°F for cooling․ For energy efficiency, set temperatures 7-10°F lower in winter and higher in summer when possible․ The thermostat will automatically adjust to maintain these settings․ If you need to override a setpoint temporarily, use the “Hold” feature to lock in the current temperature until the next scheduled period․ For permanent changes, revisit the programming menu and update the setpoints accordingly․ Properly adjusting temperature setpoints ensures optimal comfort and energy savings, aligning with your daily routine and preferences․
3․5 Using Hold and Permanent Hold Features
The Hold and Permanent Hold features on your Honeywell 7-Day Programmable Thermostat allow you to temporarily or permanently override your scheduled temperature settings․ These options are ideal for flexibility when your routine changes unexpectedly․
Temporary Hold: This feature lets you override the current temperature setting without affecting your programmed schedule․ Once the hold period ends, the thermostat will automatically resume its scheduled programming․ To activate Temporary Hold, simply adjust the temperature to your desired setpoint, and the thermostat will maintain it until the next scheduled period begins․
Permanent Hold (Vacation Mode): If you need to override your schedule indefinitely, use the Permanent Hold feature․ This is perfect for extended periods away from home, such as vacations․ To enable Permanent Hold, press and hold the “Hold” button until “Permanent Hold” appears on the display․ The thermostat will maintain your selected temperature until you manually cancel the hold․
Both features provide energy-saving benefits by allowing you to deviate from your schedule only when necessary․ Use these options wisely to balance comfort and energy efficiency․

Advanced Features of the Honeywell 7-Day Programmable Thermostat
Explore advanced features like energy-saving modes, Smart Response Technology, and remote access via smartphone app․ These innovations optimize comfort and efficiency, allowing precise temperature control and real-time monitoring for a smarter home experience․
4․1 Energy-Saving Features and Modes
The Honeywell 7-Day Programmable Thermostat is equipped with innovative energy-saving features designed to optimize your heating and cooling usage․ One of its standout features is the Smart Response Technology, which learns your home’s temperature patterns to pre-heat or cool, ensuring comfort while reducing energy waste․ Additionally, the thermostat offers an Energy-Saving Mode that adjusts temperatures slightly during peak times to minimize consumption without sacrificing comfort․
The thermostat also includes a programmable schedule that allows you to set different temperatures for weekdays and weekends, ensuring energy is used only when needed․ This 7-day programming capability helps you align your heating and cooling with your lifestyle, preventing unnecessary energy usage․ Furthermore, the thermostat features an auto-changeover mode, which automatically switches between heating and cooling to maintain consistent temperatures while optimizing energy efficiency․
By utilizing these features, homeowners can significantly reduce their energy consumption and lower utility bills․ The Honeywell thermostat’s advanced algorithms and adaptive technologies ensure that energy savings are achieved without compromising on comfort, making it an ideal choice for eco-conscious users․
4․2 Smart Response Technology Explained
Smart Response Technology is an innovative feature of the Honeywell 7-Day Programmable Thermostat that ensures your home reaches the desired temperature at the scheduled time․ This adaptive technology learns your heating or cooling system’s behavior and adjusts its operation to achieve the setpoint efficiently․ By continuously monitoring factors like your home’s insulation and system performance, it minimizes temperature fluctuations and maintains consistent comfort․ The system begins operating earlier if needed, ensuring the target temperature is met without unnecessary energy use․ This feature is particularly useful for maintaining a cozy environment while optimizing energy efficiency․ Over time, it adapts to your home’s unique characteristics, enhancing performance and reliability․ With Smart Response Technology, you can enjoy precise temperature control and potential energy savings without compromising comfort․
4․3 Remote Access via Smartphone App
The Honeywell 7-Day Programmable Thermostat offers seamless remote access through the Honeywell Home app, available for both iOS and Android devices․ This feature allows users to control their thermostat from anywhere, ensuring optimal comfort and energy efficiency․ Whether you’re at work, on vacation, or just in another room, you can adjust temperature settings, view current temperatures, and modify schedules with ease․
Remote access is particularly useful for homeowners with varying daily schedules or those who want to optimize energy savings․ For instance, you can lower the temperature when no one is home or adjust settings based on unexpected changes in plans․ The app also provides real-time notifications, such as when the system is operating in heating or cooling mode, and offers energy usage reports to help you monitor and reduce consumption․
To enable remote access, simply connect your thermostat to your home Wi-Fi network and download the Honeywell Home app․ The setup process is straightforward, and the app’s intuitive interface makes it easy to navigate and customize settings․ With remote access, you can enjoy greater control over your home’s climate and energy usage, all from the palm of your hand․
4․4 Energy Usage Reports and Monitoring
The Honeywell 7-Day Programmable Thermostat offers advanced energy usage reports and monitoring features, helping you track and manage your energy consumption effectively․ Through the smartphone app, you can access detailed historical data, including daily and weekly energy usage trends․ This feature allows you to identify patterns and optimize your temperature settings for greater efficiency․ The thermostat also provides insights into how often your heating and cooling systems operate, enabling you to make informed decisions to reduce energy waste․ Additionally, the energy usage reports can be broken down into specific time periods, making it easier to analyze and compare your consumption over different seasons or months․ By monitoring your energy usage, you can pinpoint opportunities to lower your utility bills while maintaining comfort․ The Honeywell thermostat’s reporting tools are user-friendly and accessible, ensuring that you stay in control of your energy management․ This feature is especially useful for homeowners looking to balance convenience with cost savings and environmental responsibility․
Troubleshooting Common Issues
Troubleshooting your Honeywell 7-Day Programmable Thermostat can resolve many common issues efficiently․ Start by checking if the thermostat is properly powered and connected to your HVAC system․ If the display is blank, ensure the batteries are installed correctly or that the wiring is secure․
- Thermostat Not Turning On: Verify circuit breakers or fuses․ Ensure the thermostat is set to the correct mode (Heat/Cool/Off)․
- Incorrect Temperature Readings: Check for proper calibration in the settings menu․ Ensure no drafts or direct sunlight affect the sensor․
- Schedule Not Following: Confirm the time and day settings are accurate․ If using hold or permanent hold, adjust the schedule or cancel the hold feature․
- Wi-Fi Connectivity Issues: Restart the thermostat and router․ Ensure the device is connected to the correct network and update the app if necessary․
If issues persist, refer to the Honeywell manual or contact customer support for further assistance; Regular updates and maintenance can prevent many problems and ensure optimal performance․