
RTA (Ready-to-Assemble) cabinets are cost-effective‚ DIY-friendly solutions for kitchen and bathroom renovations. They come with pre-cut components‚ hardware‚ and instructions‚ making them ideal for homeowners and contractors seeking affordability and customization.
What Are RTA Cabinets?
RTA (Ready-to-Assemble) cabinets are flat-pack furniture that requires on-site assembly. They include pre-cut panels‚ hardware‚ and instructions‚ designed for DIY installation. These cabinets are cost-effective‚ customizable‚ and ideal for kitchen‚ bathroom‚ or storage projects. While assembly is required‚ RTA cabinets offer significant savings compared to pre-assembled options‚ making them a popular choice for homeowners and contractors seeking affordable‚ high-quality solutions.
Benefits of Using RTA Cabinets
RTA cabinets offer cost savings‚ customization‚ and convenience. They are more affordable than pre-assembled options‚ allowing homeowners to save on renovation expenses; These cabinets are also space-efficient during transport and storage. Additionally‚ RTA cabinets provide flexibility in design‚ enabling users to tailor their storage solutions to specific needs. The DIY aspect empowers homeowners to achieve professional results without hiring contractors‚ making them a practical choice for budget-conscious projects.
Importance of Following Assembly Instructions
Following assembly instructions ensures proper installation and functionality of RTA cabinets. Misaligned panels‚ stripped screws‚ and incorrect hardware usage can lead to structural issues. Instructions provide step-by-step guidance to avoid common mistakes‚ ensuring safety and durability. Adhering to the manual prevents costly errors and guarantees a professional finish‚ while also protecting the product’s performance and lifespan. Proper assembly is key to enjoying long-term benefits and reliability.

Tools and Materials Required
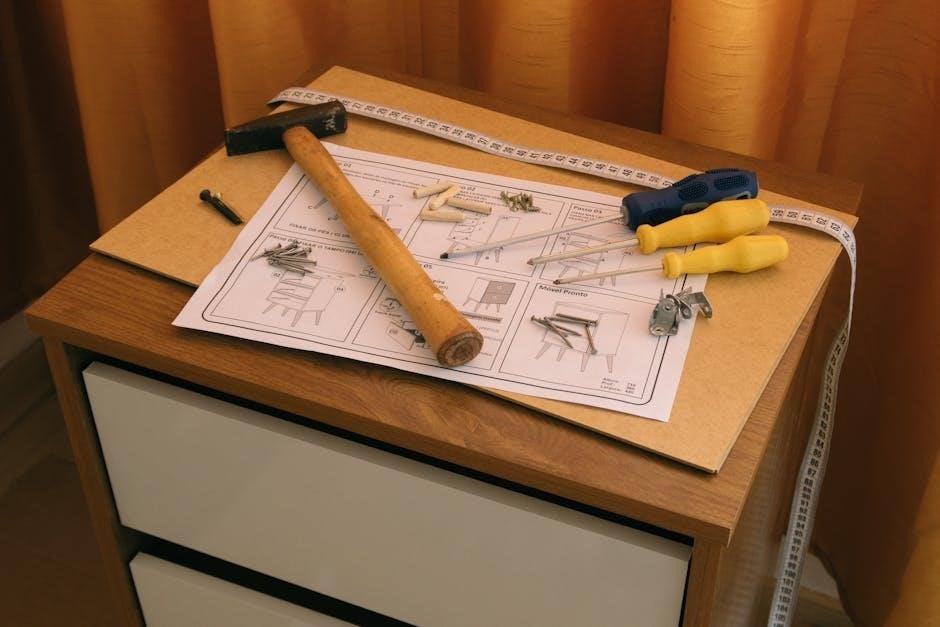
Essential tools include screwdrivers‚ power drills‚ and rubber mallets. Optional tools are nail guns and staple guns for faster assembly. Materials provided are cam locks‚ metal brackets‚ screws‚ shelf clips‚ and wood glue.
Essential Tools for Assembly
The essential tools for assembling RTA cabinets include a screwdriver‚ power drill‚ and rubber mallet. Optional tools like nail guns and staple guns can speed up the process. Materials provided in the kit typically include cam locks‚ metal brackets‚ screws‚ shelf clips‚ and wood glue. Organizing these tools and materials beforehand ensures a smooth and efficient assembly experience.
Optional Tools for Faster Assembly
Optional tools like nail guns‚ staple guns‚ and power drills can significantly speed up the assembly process. A nail gun helps secure panels quickly‚ while a staple gun is useful for heavy-duty applications. Additionally‚ a power drill with screwdriver and drill bits can enhance efficiency. These tools are not essential but can make the process smoother and faster‚ especially for larger or more complex cabinet projects.
Materials Provided in the RTA Kit
An RTA kit typically includes pre-cut panels‚ shelves‚ and hardware such as screws‚ cam locks‚ and shelf clips. Additional components like drawer glides‚ metal brackets‚ and toe kicks may also be provided‚ depending on the cabinet type. All necessary parts are carefully packaged to ensure a complete and straightforward assembly process‚ with detailed instructions included to guide you through each step.

Understanding the Hardware and Parts
RTA kits include essential hardware like cam locks‚ screws‚ shelf clips‚ and glides. These components ensure stability and proper functionality‚ with clear instructions provided for their use.
Identifying Cabinet Components
Start by identifying the cabinet components‚ such as side panels‚ top and bottom panels‚ shelves‚ and back panels. Doors‚ drawers‚ and handles are also included. Hardware like cam locks‚ screws‚ and shelf clips are essential for assembly. Refer to the provided diagrams or labels to organize and match each part correctly before starting the assembly process. This step ensures a smooth and efficient build.
Hardware List for Base and Wall Cabinets
The hardware kit typically includes cam locks‚ screws‚ shelf clips‚ and drawer glides for base cabinets. Wall cabinets require additional items like mounting brackets and hinges. Ensure all components are included and labeled according to the PDF instructions. Some kits may also provide optional items like nail guns or staple guns for added stability. Always refer to the hardware list in your specific RTA cabinet assembly PDF for exact requirements.
Role of Cam Locks and Brackets
Cam locks and brackets are essential for securing RTA cabinet panels together. Cam locks create a tight joint between panels‚ ensuring structural integrity‚ while brackets provide additional support‚ especially for shelves and drawers. Proper installation‚ as per the RTA assembly PDF‚ ensures stability and prevents wobbling. These components are crucial for achieving a professional finish without the need for advanced tools or expertise.
Preparing the Workspace
Clear a large‚ flat area for assembly‚ ensuring enough space to lay out all components. Protect surfaces with a drop cloth or old sheets to prevent scratches or damage. Organize all parts and hardware to avoid losing small items. Ensure good lighting and proper ventilation for a safe and efficient assembly process.
Protecting Your Work Surface
Always cover your work area with a protective layer‚ such as a drop cloth or old sheets‚ to prevent scratches and damage from tools or materials. Ensure the surface is clean and dry before starting assembly. Secure the protective covering with tape to avoid shifting during the process. Regularly clean up debris and spills to maintain a safe and organized workspace. This step ensures your RTA cabinet assembly proceeds smoothly and without damage to surrounding areas.
Organizing the Components
Begin by carefully unboxing and sorting all components into categorized groups‚ such as panels‚ hardware‚ and accessories. Use bins or containers to separate small parts like screws and clips. Label each group for easy identification. Refer to the assembly manual to ensure all parts are accounted for and correctly matched to their descriptions. Double-check the inventory list to confirm nothing is missing before proceeding. This step saves time and reduces confusion during assembly.
Reading the Assembly Manual
Begin by thoroughly reading the assembly manual provided with your RTA cabinet kit. Pay attention to the inventory list to ensure all parts are included. Familiarize yourself with the diagrams and step-by-step instructions for clarity. Note any specific recommendations for tools or techniques. Review safety precautions and troubleshooting tips to avoid common mistakes. Understanding the manual will guide you through the process efficiently and ensure a successful assembly.

Step-by-Step Assembly Guide
Start by preparing your workspace and organizing components. Follow the manual’s step-by-step instructions‚ beginning with the base cabinet assembly‚ then move to wall cabinets. Ensure proper alignment and use cam locks and brackets for secure connections. Assemble shelves and drawers‚ then attach doors and handles. Double-check each step for accuracy to achieve a stable and functional final product.
Assembling the Base Cabinet
Begin by laying out all panels on a soft surface to prevent scratches. Attach the back panel to the side panels using cam locks and screws. Ensure the top and bottom panels are aligned and securely fastened. Install shelves using shelf clips and glide supports for stability. Attach the toe kick panel to the front side panels. Follow the manual for specific screw sizes and wood glue application. Double-check all connections for proper alignment before proceeding.
Assembling the Wall Cabinet
Wall cabinets are simpler to assemble than base cabinets as they lack drawers and toe kicks. Start by laying out all panels on a soft surface. Attach the back panel to the side panels using cam locks and screws. Secure the top and bottom panels to the sides‚ ensuring proper alignment. Install shelves using shelf clips and supports. Finally‚ attach the hanging system to the top panel for wall mounting. Double-check all connections for stability and alignment before installation.
Installing Shelves and Drawers
Install shelves by aligning shelf pins with pre-drilled holes in the cabinet sides. Secure with shelf clips for stability. For drawers‚ attach glides to the drawer and cabinet frame‚ ensuring smooth operation; Align the drawer with the glide and secure it with screws. Test the drawer’s movement to ensure proper function. Adjust glide supports if necessary for even alignment and smooth sliding. Ensure all hardware is tightened firmly for durability.
Attaching Doors and Handles
Align the door with the cabinet frame‚ ensuring hinges are properly seated. Secure the door using screws provided‚ tightening firmly. Install handles by centering them on the door and attaching with screws. Adjust hinges for proper alignment and door closure. Test the door’s operation to ensure smooth movement and even gaps. Tighten all hardware to prevent loosening over time. Ensure handles are securely fastened for durability and ease of use.
Troubleshooting Common Issues
Address misaligned panels by adjusting hinges or using shims. For stripped screws‚ apply wood glue and let it set before re-screwing. Ensure doors align properly by tightening hardware and checking hinge placement.
Fixing Misaligned Panels
Misaligned panels can be corrected by adjusting the hinges or using shims. Check the hinge screws and tighten them if loose. If panels still don’t align‚ gently tap them into place with a rubber mallet. Ensure all cam locks are securely fastened. For severe misalignment‚ re-examining the assembly steps and verifying hardware placement is essential. Proper alignment ensures stability and a polished finish.
Dealing with Stripped Screws
If screws become stripped‚ avoid forcing them‚ as this can damage the material. Instead‚ use a screw extractor or pliers to carefully remove the stripped screw. Apply wood glue to the hole and let it dry before re-drilling. For minor stripping‚ switch to a higher-quality screwdriver or use a rubber grip to enhance torque. Prevent future stripping by ensuring screws are properly aligned and not overtightened.
Adjusting Doors for Proper Alignment
Ensure doors align properly for smooth operation and a polished look. Use a screwdriver to adjust hinge screws‚ loosening them slightly to reposition the door. Check spacing between doors and frames‚ making sure they are even. If doors are uneven‚ tighten or loosen screws as needed. Test doors after adjustments to confirm they close securely. Refer to the RTA cabinet assembly PDF for specific diagrams and guidance. Achieving perfect alignment enhances functionality and aesthetics.
Additional Resources
Download RTA cabinet assembly PDF guides for detailed step-by-step instructions. Access 3D diagrams‚ assembly videos‚ and interactive tools like the BILT app for visual guidance. Troubleshoot issues with live chat support and comprehensive FAQs to ensure successful assembly.
Downloading the RTA Cabinet Assembly PDF
Downloading the RTA cabinet assembly PDF provides a comprehensive guide with step-by-step instructions‚ 3D diagrams‚ and hardware lists. Access the PDF directly from manufacturer websites or platforms like KitchenCabinetKings.com. The PDF includes detailed assembly steps for base and wall cabinets‚ troubleshooting tips‚ and visual aids. Use the BILT app for interactive 3D assembly guidance. Ensure to download the correct model-specific PDF for accurate instructions tailored to your cabinet design.
Watching Assembly Videos
Watching assembly videos complements the RTA cabinet assembly PDF‚ offering visual guidance for each step. Videos demonstrate how to attach hardware‚ align panels‚ and secure shelves. Platforms like YouTube and manufacturer websites provide tutorials for base‚ wall‚ and specialty cabinets. Interactive 3D guides via apps like BILT enhance understanding‚ making complex tasks easier. Visual instruction helps novices master assembly techniques and troubleshoot common issues efficiently.
Accessing 3D Diagrams
3D diagrams provide a detailed‚ interactive visual guide for RTA cabinet assembly‚ helping users understand complex steps. Available online or through apps like BILT‚ these diagrams offer 360-degree views and step-by-step animations. They complement PDF instructions by showing how parts connect and align‚ reducing errors. Manufacturers often include links to 3D models in their assembly manuals‚ making it easier to visualize the process before starting.
Time Estimates and Tips
Assembling RTA cabinets typically takes 35 minutes for the first and 10-20 minutes for subsequent ones. Tips include having a helper‚ using power tools‚ and following instructions closely.
Estimated Assembly Time for Beginners
Beginners can expect to spend about 35-45 minutes assembling their first RTA cabinet. This includes time to unpack‚ organize‚ and understand the instructions. Subsequent cabinets typically take 15-25 minutes as familiarity grows. Plan for extra time to prepare tools and workspace. Organizing components beforehand and following instructions step-by-step will significantly speed up the process. Practice makes perfect‚ so don’t be discouraged by the initial learning curve.
Tips for Faster Assembly
Organize all components and hardware before starting to save time. Use a power drill instead of a screwdriver for quicker screw driving. Pre-drill holes to avoid splitting wood and ensure alignment. Follow instructions step-by-step to maintain momentum. Use cam locks efficiently by pre-installing them in panels. Keep all tools within reach and use wood glue sparingly but effectively on joints. These tips will streamline the process and reduce assembly time significantly.
Avoiding Common Mistakes
To ensure a smooth assembly process‚ avoid rushing and thoroughly read instructions before starting. Misaligned panels and stripped screws are common issues caused by improper hardware use. Always pre-drill holes to prevent wood splitting and apply wood glue sparingly but effectively. Double-check cam lock installations and ensure shelves are level before securing them. These precautions will help you avoid costly errors and achieve a professional finish.

Cost and Time Savings
RTA cabinets offer significant cost savings compared to pre-assembled options‚ with faster assembly times for experienced DIYers‚ typically 10-20 minutes per cabinet after the first one.
Comparing RTA Cabinets to Pre-Assembled Options
RTA cabinets are significantly cheaper than pre-assembled options‚ offering savings of up to 50%. They require DIY assembly but provide customization flexibility. Pre-assembled cabinets arrive ready for installation‚ saving time but costing more upfront. RTA cabinets are ideal for budget-conscious projects‚ while pre-assembled suits those prioritizing convenience and speed. Both options offer quality‚ but the choice depends on budget‚ time‚ and DIY comfort.
Calculating the Cost of Tools and Materials
Essential tools like screwdrivers‚ drills‚ and rubber mallets are often required. Optional tools‚ such as nail guns‚ can speed up assembly. Materials like wood glue‚ screws‚ and brackets are usually provided. Costs vary based on cabinet size‚ brand‚ and hardware quality. Budget-friendly options exist‚ but investing in durable tools can save money long-term. Plan accordingly to avoid unexpected expenses during assembly.
Long-Term Benefits of RTA Cabinets
RTA cabinets offer durability and style‚ lasting for years with proper care. Their modular design allows easy customization and upgrades. Affordable upfront costs and potential resale value make them a smart investment. Additionally‚ they are eco-friendly‚ reducing waste by being flat-packed and efficiently shipped. Their versatility ensures they adapt to changing interior trends‚ providing long-term satisfaction and functionality for homeowners and businesses alike.
Safety Precautions
Always wear protective gear‚ including gloves and safety glasses. Use tools properly to avoid injuries. Ensure a stable work surface and handle heavy components with care to prevent accidents.
Essential Safety Measures
Always wear protective gear‚ such as gloves and safety glasses‚ when handling tools and components. Ensure the workspace is clear of clutter and well-lit. Use a stable work surface and avoid overreaching. Handle heavy panels and components with care‚ and consider enlisting a second person for support. Keep loose clothing and long hair tied back to avoid accidents. Follow all manufacturer instructions to prevent errors and injuries during assembly.
Proper Use of Tools
Use a power drill for screwing components together and a rubber mallet for tapping parts into place without causing damage. Ensure screwdrivers are Phillips-head to avoid stripping screws. Nail guns and staplers should be handled with care to prevent accidental discharge. Always follow the tool manufacturer’s guidelines and maintain a firm grip to prevent slippage and ensure precise assembly. Misuse of tools can lead to damaged parts or personal injury.
Handling Heavy Components Safely
Always lift heavy components with care‚ bending at the knees to avoid straining your back. Use a second person for assistance when moving large panels or cabinets. Ensure the surface is clear to prevent tripping. Secure components firmly to avoid accidental shifting during assembly. Use a rubber mallet to gently tap parts into place‚ reducing the risk of damage or injury. Prioritize stability to maintain control and safety throughout the process.
Successfully assembling RTA cabinets requires patience‚ attention to detail‚ and proper tools. With clear instructions and organization‚ you can achieve professional results‚ saving time and money while enjoying the satisfaction of a DIY project.
Final Check Before Use
After assembling your RTA cabinets‚ perform a thorough inspection to ensure all parts are securely attached. Check door alignment‚ drawer functionality‚ and shelf stability. Verify that all screws‚ cam locks‚ and brackets are tightened properly. Ensure surfaces are clean and free of debris. Test each component to confirm smooth operation. Address any misalignments or loose connections before putting the cabinets into use to guarantee safety and durability.
Maintaining Your RTA Cabinets
Regularly clean your RTA cabinets with a soft cloth and mild detergent to prevent dust buildup. Avoid harsh chemicals that may damage finishes. Inspect and tighten any loose hardware periodically. Protect surfaces from moisture and spills by wiping them promptly. For scratches or wear‚ apply touch-up paint as needed. Proper maintenance ensures longevity and preserves the aesthetic appeal of your cabinets.
Seeking Professional Help if Needed
If you encounter challenges during assembly or prefer expert assistance‚ consider consulting a professional. This ensures proper structural integrity and alignment‚ especially for complex configurations. Many manufacturers offer support through interactive tools like the BILT app or direct customer service. Don’t hesitate to reach out for guidance to achieve a flawless result and ensure your cabinets function as intended.