
Wildgame Innovations offers high-quality trail cameras designed for wildlife monitoring, featuring advanced settings like motion detection, night vision, and high-resolution imaging. This guide provides essential setup and operational insights to maximize performance.
1.1 Overview of Wildgame Innovations and Their Products
Wildgame Innovations specializes in outdoor gear, offering trail cameras, game feeders, and attractants. Their trail cameras feature advanced technologies like motion detection, night vision, and high-resolution imaging. Known for durability and ease of use, these cameras are designed for wildlife enthusiasts and hunters. The product line includes models with cellular connectivity, ensuring remote monitoring. Accessories like bungee cords and power solutions enhance functionality. Wildgame Innovations aims to deliver reliable tools for effective wildlife surveillance and game management.
1.2 Importance of Reading the User Manual
Reading the user manual is crucial for understanding your Wildgame Innovations trail camera’s features, settings, and proper usage. It provides detailed instructions for installation, configuration, and troubleshooting, ensuring optimal performance. The manual explains key functions like motion detection, night vision, and memory management. It also covers safety guidelines, warranty information, and compliance with FCC regulations. By following the manual, users can avoid common issues and maximize their camera’s effectiveness for wildlife monitoring and scouting.
Setting Up Your Wildgame Innovations Trail Camera
Setting up your Wildgame Innovations trail camera involves unpacking, inventorying components, installing batteries and SD cards, and securely mounting the device. This ensures optimal performance.
2.1 Unpacking and Inventorying the Camera
Begin by carefully unpacking your Wildgame Innovations trail camera to ensure all components are included. Typically, the package contains the camera unit, user manual, USB cable, bungee cords, and mounting hardware. Review the manual to familiarize yourself with the device’s features and specifications, such as resolution, motion detection, and night vision capabilities. Verify each item against the packing list to confirm completeness before proceeding with setup.
2.2 Installing Batteries and SD Card
Open the battery compartment by sliding the latch to the left. Insert batteries with the positive ends facing you, as marked. Close the compartment securely. Next, locate the SD card slot, insert the card with connectors up, ensuring it clicks into place. Use an SD card up to 32GB, formatting it in your computer before first use if necessary. Proper installation ensures optimal camera performance and data storage.
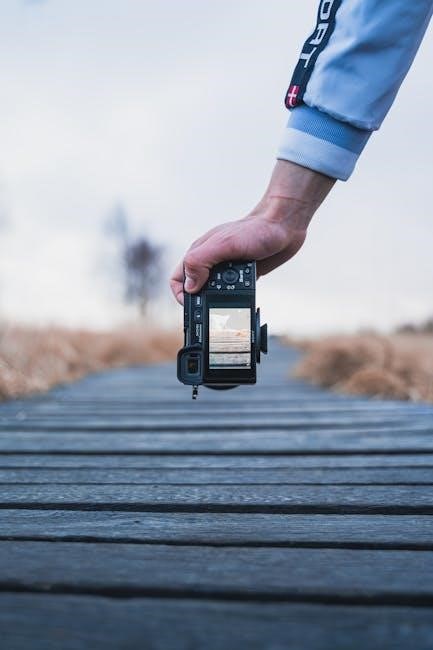
2.3 Mounting the Camera on a Tree or Stand
Mount the camera by latching the bungee cords through the mounting holes on the left or right side. Secure the cords tightly to a tree or stand for stable positioning. For external power, open the weather-resistant cover and use a Wildgame Innovations 6-volt battery accessory. Ensure the camera is level and facing the desired area. Test the camera after mounting to confirm proper installation and functionality. This setup ensures optimal performance and reliability in the field.

Features of the Wildgame Innovations Trail Camera
Wildgame Innovations trail cameras feature high-resolution imaging, infrared LEDs for night vision, motion detection, and memory support up to 64GB SD cards for reliable wildlife monitoring.
3.1 Image and Video Quality Settings
Wildgame Innovations trail cameras offer customizable image and video settings, ensuring high-quality captures. The camera supports resolutions up to 6 MP for still images and records AVI-format videos. With 30 high-intensity infrared LEDs, it captures clear nighttime footage. Users can adjust settings like resolution and video length to optimize storage and quality. The camera also features an image stamp, embedding date, time, and location on photos for precise documentation.
3.2 Motion Detection and PIR Sensor
The Wildgame Innovations trail camera features a passive infrared (PIR) sensor with a detection range of up to 60 feet. This sensor triggers the camera based on heat and motion, ensuring swift capture of wildlife activity. Users can adjust the PIR sensitivity to reduce false triggers, optimizing battery life and storage. The camera enters active mode during Flextime periods, enhancing monitoring efficiency without constant activation, thus conserving resources while maintaining reliable detection performance.
3.3 Night Vision and Infrared LEDs
The Wildgame Innovations trail camera is equipped with high-intensity infrared LEDs, providing night vision capabilities up to 70 feet. These LEDs are designed to capture images in low-light conditions without producing visible light, ensuring wildlife remains undisturbed. The camera uses 30 infrared LEDs for clear, black-and-white images at night. This feature is energy-efficient, minimizing battery consumption while maintaining reliable performance in darkness, making it ideal for 24/7 wildlife monitoring.
3.4 Memory Capacity and SD Card Requirements
The Wildgame Innovations trail camera supports SD, SDHC, and SDXC cards, with a maximum capacity of up to 64GB. For optimal performance, use a high-quality SD card formatted in FAT32. The camera requires proper formatting before use to ensure compatibility and prevent data loss. Cards larger than 32GB should be formatted in the camera, not a computer. This ensures seamless operation and storage of images and videos captured by the device.
Configuring the Camera Settings
Configure date, time, and location settings, adjust PIR sensitivity, and explore Flextime and Surveillance modes for tailored monitoring. Optimize camera performance with these customizable options.
4.1 Setting the Date, Time, and Location
To set the date, time, and location on your Wildgame Innovations trail camera, press the center navigation button to access the menu. Use the navigation buttons to scroll through options and select the desired settings. Enter the correct date, time, and location using the on-screen interface. Save your changes to ensure accurate image stamping and location-based data. The camera will automatically enter Power Save Mode after 30 seconds of inactivity to conserve battery life.
4.2 Adjusting PIR Sensitivity and Trigger Delay
Adjust the PIR (Passive Infrared) sensitivity to customize motion detection. Press the center navigation button, scroll to PIR Sense, and select your preferred setting using the navigation buttons. A higher sensitivity increases detection range but may cause false triggers. For trigger delay, press the center button, navigate to Delay, and set the time between detections. This helps manage storage and reduces redundant images. Save your settings to optimize camera performance for your specific needs.
4.3 Understanding Flextime and Surveillance Modes
Flextime mode activates the camera twice daily, 15 minutes before sunrise to 1 hour after, and 15 minutes before sunset to 1 hour after. This reduces unnecessary activity. Surveillance mode keeps the camera active continuously until turned off, ideal for constant monitoring. Use the navigation buttons to select and customize these modes. Press the center button to save settings, optimizing camera operation based on your surveillance needs and ensuring efficient use of battery life and storage space.
Using the Camera in the Field
Position the camera near game trails or feeding areas for optimal wildlife capture. Ensure the camera is weather-resistant and securely mounted. Regularly check SD cards and power status for uninterrupted operation.
5.1 Best Practices for Placing the Camera
Position the camera strategically near game trails, feeding areas, or water sources to maximize wildlife detection. Mount it 3-4 feet high to capture animals effectively. Face the lens north to avoid direct sunlight and glare. Ensure the camera is level and securely fastened to a tree or stand. Clear obstructions from the field of view for unobstructed image capture. Place it where wildlife activity is highest, such as near food sources or natural pathways, for optimal results.
5.2 Retrieving Images and Videos
To retrieve images and videos, ensure the camera is powered off. Remove the SD card and insert it into a card reader or transfer directly via USB to your computer. Use the provided USB cable to connect the camera to your device for file transfer. Avoid data loss by ensuring the camera is properly disconnected after transfer. Organize files by date or location for easy access. Regularly check and manage storage to prevent memory overload and ensure continuous operation.
5.3 Power Management and Battery Life
Ensure batteries are inserted correctly with positive ends facing the marked side. Use high-quality batteries for optimal performance. The camera features a Power Save Mode, turning off the LCD after 30 seconds of inactivity to conserve energy. For extended use, consider an external power source via the 6V accessory port. Monitor battery levels using the low-battery indicator. Replace or recharge batteries promptly to avoid interruptions in camera operation. Regularly check battery health to maintain reliable performance in the field.

Troubleshooting Common Issues
Address battery, SD card, and motion detection issues promptly. Consult the user manual for solutions to power problems, memory errors, and trigger failures to ensure optimal camera performance.
6.1 Solving Battery and Power Problems
Battery issues are common but easily resolved. Ensure batteries are inserted correctly with positive ends facing the correct terminals. Use high-quality alkaline or lithium batteries for optimal performance. If the camera doesn’t power on, check for corrosion or weak connections. External power sources, like Wildgame Innovations’ 6V battery accessory, can provide reliable alternative power. Always turn off the camera when changing batteries to prevent power surges. Regularly test battery levels to avoid sudden shutdowns during critical monitoring periods.
6.2 Fixing SD Card and Memory Issues
If the camera doesn’t recognize the SD card, ensure it’s properly formatted and compatible (up to 32GB or 64GB, depending on the model). Power cycle the camera by turning it off and on. Check for visible damage or corruption on the card. Use a card reader to retrieve images if the camera fails to read the SD card. Always format new SD cards in a computer before first use to prevent memory issues and ensure optimal performance.
6.3 Resolving Motion Detection and Trigger Failures
If motion detection or trigger issues occur, check the PIR sensitivity settings and ensure the sensor is clean. Adjust the trigger delay and verify the sensor range is appropriate for your setup. Ensure no obstacles block the sensor’s field of view. Low battery levels or extreme temperatures can also affect performance. Test the camera in a controlled environment to confirm functionality. If issues persist, refer to the user manual or contact Wildgame Innovations customer support for further assistance.
Maintenance and Care of the Trail Camera
Regularly clean the lens and housing to ensure optimal performance. Protect the camera from extreme weather and tampering. Check batteries and update software as needed for reliability.
7.1 Cleaning and Protecting the Camera
Regular maintenance ensures optimal performance. Clean the lens with a soft cloth to prevent dust buildup. Protect the camera from extreme weather by using weather-resistant covers. Avoid harsh chemicals, as they may damage the housing. Inspect the camera for damage or wear. Use a dry cloth to wipe down the exterior. Store the camera in a dry place when not in use; Regular cleaning and protection extend the camera’s lifespan and ensure reliable operation in the field.
7.2 Updating Software and Firmware
Updating the camera’s software and firmware ensures optimal performance and access to new features. Use the provided USB cable to connect the camera to a computer. Download the latest updates from Wildgame Innovations’ website. Follow the on-screen instructions to install the updates. Ensure the camera is fully powered during the update process. Regular updates improve functionality and compatibility, ensuring your trail camera operates at its best.
7.3 Warranty and Repair Options
Wildgame Innovations trail cameras are backed by a limited warranty covering defects in materials and workmanship. Register your product online within 14 days of purchase to activate the warranty. For repairs, contact customer service at 800.847.8269 or visit their website for detailed instructions. The warranty period varies by model, typically spanning one year from the purchase date. Ensure to retain your purchase receipt for warranty validation. Repairs and replacements are handled through their support team, ensuring your camera remains operational and reliable.
FCC Compliance and Safety Information
This device complies with Part 15 of the FCC Rules, ensuring no harmful interference. Use as intended to avoid damage and ensure safe operation. Follow guidelines carefully.
8.1 Understanding FCC Regulations
Wildgame Innovations trail cameras comply with FCC regulations under Part 15, ensuring no harmful interference. Operation is subject to two conditions: the device must not cause interference and must accept any interference received. Non-compliance may result in service issues. Proper installation and usage are essential to maintain compliance. Modifications without FCC approval are prohibited. Refer to the user manual for detailed compliance information to ensure proper usage and adherence to regulations.
8.2 Safety Precautions and Usage Guidelines
Ensure safe operation by following guidelines: avoid exposing the camera to extreme weather conditions, keep it out of reach of children, and handle batteries with care. Do not modify the device or use unapproved accessories. Mount the camera securely to prevent damage or injury. Always disconnect the USB cable before handling the camera. Follow all FCC regulations and manufacturer instructions to ensure safe and effective use. Regular maintenance and updates are recommended for optimal performance and longevity of the device.
Wildgame Innovations trail cameras offer reliable, advanced tools for wildlife monitoring. By following this guide, users can maximize performance and enjoy successful outdoor surveillance experiences consistently.
9.1 Maximizing the Performance of Your Trail Camera
To maximize performance, ensure proper installation of batteries and SD cards, use optimal settings for image quality and motion detection, and strategically position the camera in high-traffic wildlife areas. Regular maintenance, such as cleaning and updating firmware, ensures longevity and reliability. Adhering to these guidelines will help you capture clear images and videos, providing valuable insights into wildlife activity and patterns.
9.2 Final Tips for Effective Wildlife Monitoring
For effective wildlife monitoring, position cameras near food sources or game trails. Use the Flextime and Surveillance modes to capture activity during peak times. Regularly check and replace batteries, and ensure SD cards have sufficient storage. Review images promptly to adjust settings or locations as needed. These practices enhance data collection, providing a deeper understanding of wildlife behavior and habitat preferences.